Final Cut Pro is a powerful program that offers many, if not all, of the tools Any filmmaker might need to create quality videos. One of these features that can instantly transform your videos is using LUTs to help with the color grading. In this article, we will so you how to use custom LUTs in your videos and adjust the mix to get the perfect color graded clip.
How to Apply a Single LUT to Your Clip
Import Your Clips
The obvious first step is to import your clips into your timeline. I typically like to keep my Final Cut Pro as organized as possible so I will create a separate Event and add a new Project specifically for this. If you already have a Project you are working on then you can skip this step.
Open the Effects Browser Panel
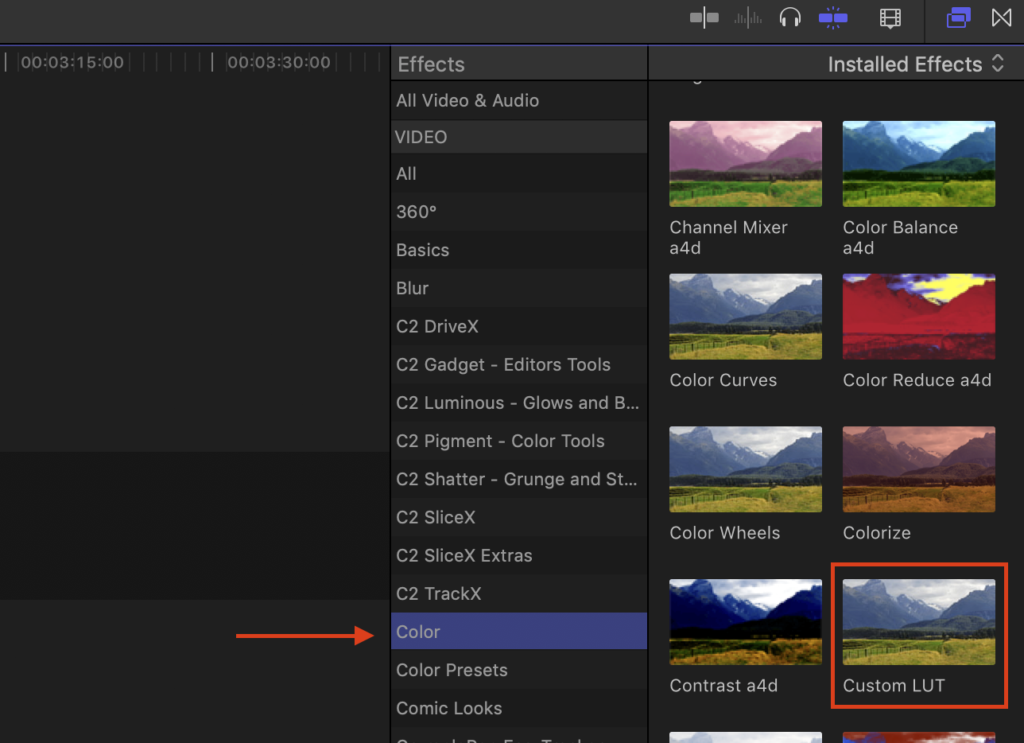
Once you have your project or clip ready you will need to navigate to the right side of the timeline and click on the Effects Browser. This is located to the left of the Transitions Browser and is represented by an icon with you overlapping rectangles. Under the “Video” section you will see the “Color” Menu. There you will find the Custom LUT effect and this is the effect that you will click and drag onto the clip you would like to apply the LUT to.

Choose Your Custom LUT
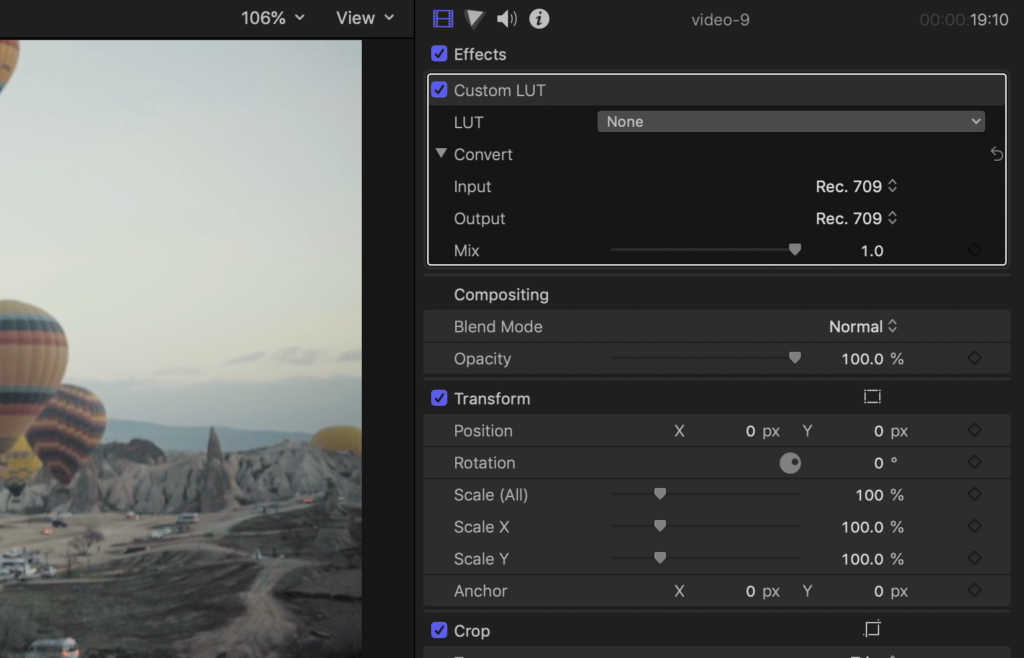
Now for the next part, you will need to navigate to the Inspector. This is the classic filmstrip icon at the top of your FCPX window. There you will see the Custom LUT effect you applied to your clip. Note: if you don’t see Custom LUT in the inspector, make sure you have the clip selected.

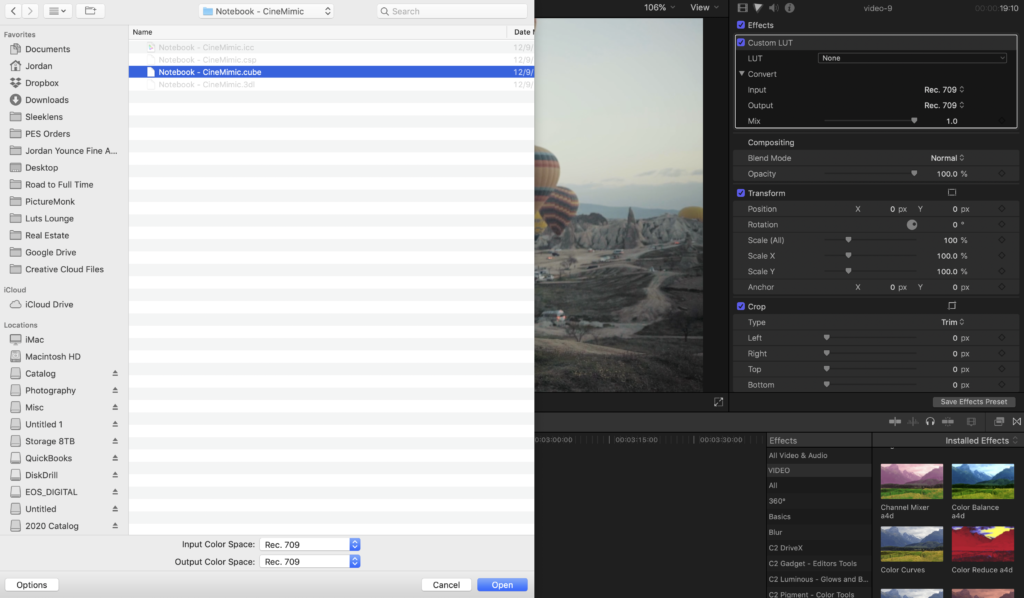
Click the drop-down bar next to LUT and select “Choose Custom LUT…”. This will open up a Finder window and will allow you to navigate to where your custom LUT files are. In this example, I am using one of the custom cinematic LUTs from the CineMimic Collection. Find the .cube file (it should be the only one that is not greyed out, and click “Open” to apply the effect to your clip.

Adjusting the Intensity
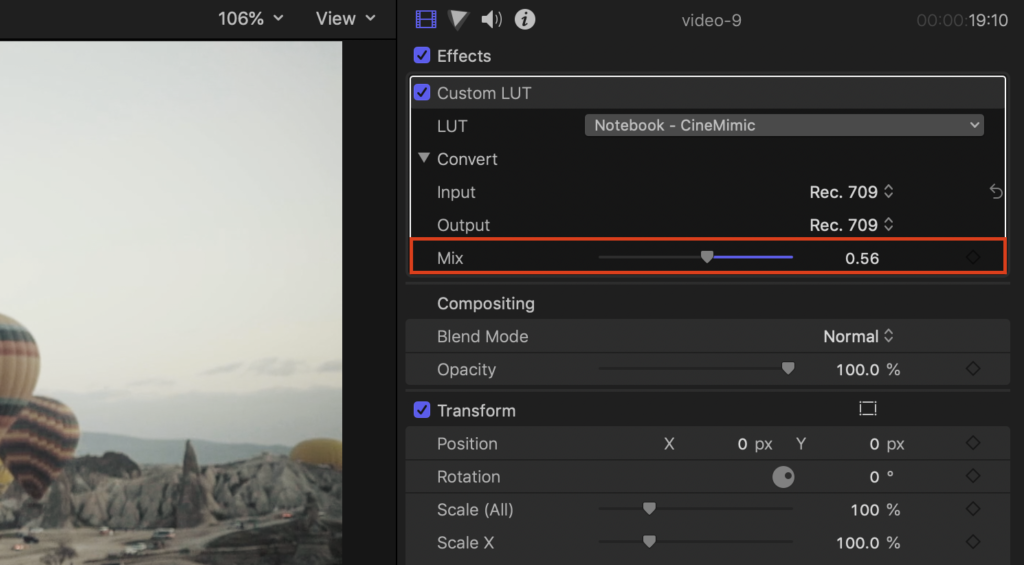
Now that you have your custom LUT applied to your clip, you might want to lessen the effect if it is too much. You can use the Mix slider to adjust the intensity of the effect. You probably won’t have to do this every time you apply a LUT file but it is good to have so you get more control.


