If you are not experienced with long exposure photography it would certainly be a great technique to start learning. It is very popular in the landscape world and you have most likely seen examples of this and wondered how it was done.
As fun as long exposure photography is it can be challenging depending on the location and time of day. If it is really bright day and you don’t have any ND filters on your lens, you will have a hard time getting a slow enough shutter speed to detect the motion of the subject in your photo. That being said, did you know you can use a video clip to achieve the same result? It is very easy and we will show you how!
Getting the Right Video Clip
For this effect to really work you will need the right type of clip. For the best results, you really need a stabilized video clip that is ideally locked off on a tripod. You really need the only movement to be whatever your desire subject is. In this tutorial, we will be using a video clip of a couple waterfalls. Bottom line, no handheld clips and you will need at least 10 seconds to be safe.
Importing the Clip Into Photoshop
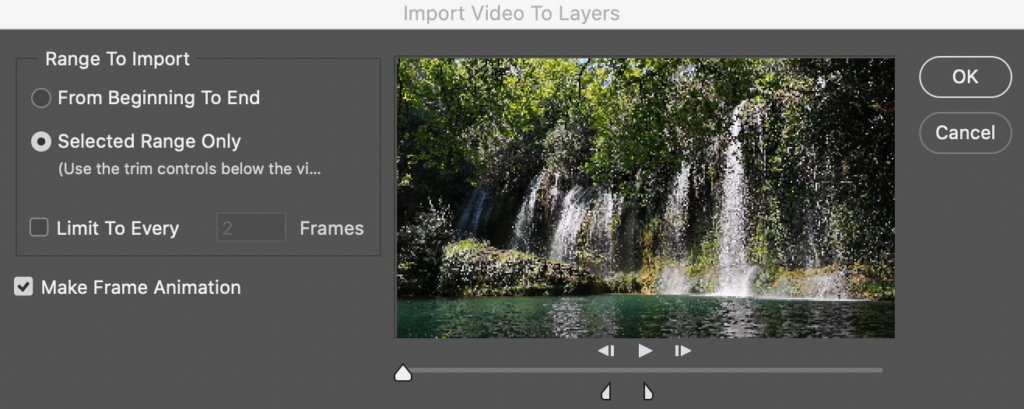
To import your short clip into Photoshop, you will need to open Photoshop and go to File > Import > Video Frames to Layers. Here you will select your clip and press Open. Here is where you will select your import range and trim your clip. Choose the “Selected Range Only” option and adjust the trim controls under the playhead of the clip preview to short section of the clip. Remember, we don’t need hundreds of photos to make this effect work. You can probably get away with less than 100 but at least have 50. After that is done press OK.

This will start the process of your computer exporting each individual clip into different layers in Photoshop.
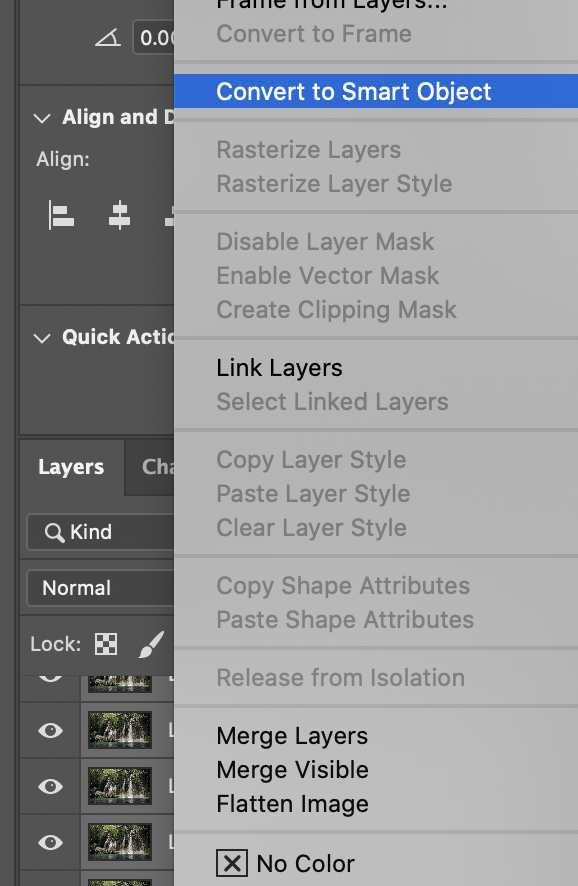
Once this is done, turn on all the “eye balls” on each of the layers to unhide them. Next highlight all the layers, right click and press Convert to Smart Object. This will combine all of the layers into in Smart Object that you have the ability to alter later if needed.

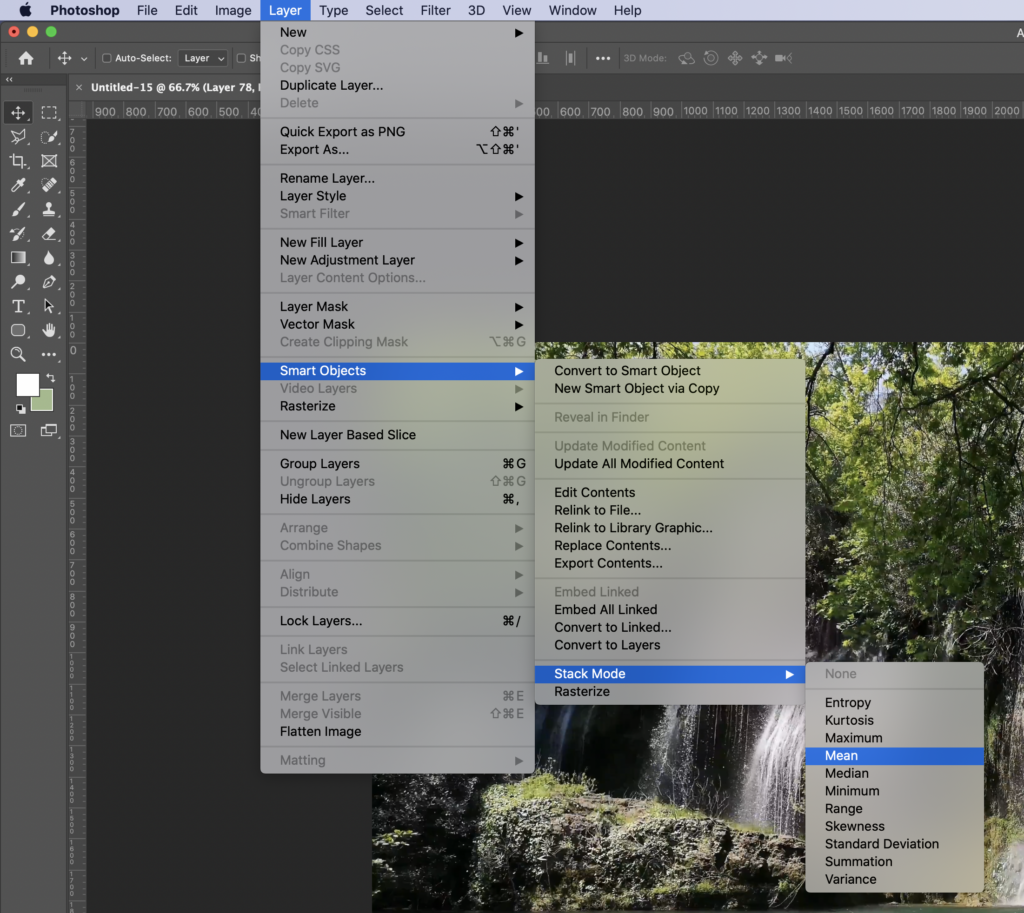
After this is done and you have your Smart Object, do to Layer > Smart Objects > Stack Mode > Mean.

This will start the process of converting your Smart Object into one long exposure image. Photoshop does this by finding the motion in all of the layers and merging them together.
And there you go! You have created a long exposure image using a video clip! Now you can adjust the clip as need to achieve your desired result!


