If you haven’t heard of Proxy file when it comes to video editing you are really missing out. Proxy files, also known as Proxies, are serious a beautiful thing when it comes to creating less headache and frustration for low times, Proxy files are something you definitely need to start using.

What Exactly Are Proxy Files?
Basically, proxies are low-resolution and lower-bitrate versions of video files that take the place of the larger files that are imported into your video editor like Adobe Premiere or Final Cut Pro X. These are so important because the lower-resolution versions of the video render faster especially when you start applying custom transitions and color grading effects. This is especially useful when working with RAW or uncompressed video files from cameras such as the BlackMagic Design Pocket Cinema Camera.
Now, just because you are using a lower-quality version of the video file doesn’t mean your final video project will be lower resolution as well. It just means while you are putting your video together, your computer should handle the video files much easier and this will allow you to apply effects and put together your project while still being able to enjoy decently smooth playback. This is because your computer will not have to render the full resolution video but the lower-resolution. Once you are finished with your video project and it is time to export you will still be exporting the full-resolution clip!
One thing to note about Proxies, when you start working with a bunch of proxy files, you a basically creating even more files in your video editors library which can fill up your hard drive more and more over time. This is especially true for programs like Final Cut Pro X. This is where you would want to delete rendered and optimized files every so often to make sure your computer is running smoothly and you are not junking up your hard drive.
In short, proxies are low-resolution video files that can take the place of larger-resolution video files in your timeline. This is important because low-res files render faster in your video editing app — which is especially useful for RAW and uncompressed video. Editors use proxy workflows when working on large-scale feature projects, just so the computer they’re working on can handle the load.
How to Create Proxy Files in Final Cut Pro X
There are many ways to create Proxies in Final Cut Pro but the two most common ways to do it during the import of your media files or doing it via the inspector after your files are imported.
Creating Proxies During Import
If you are like me and you drag your video files into your final cut project, it is very easy to set up your FCPX to do this automatically via the FCPX Preference settings.
- Click on the Final Cut Pro Menu and select Preferences. Click Import to view all of the available import settings.
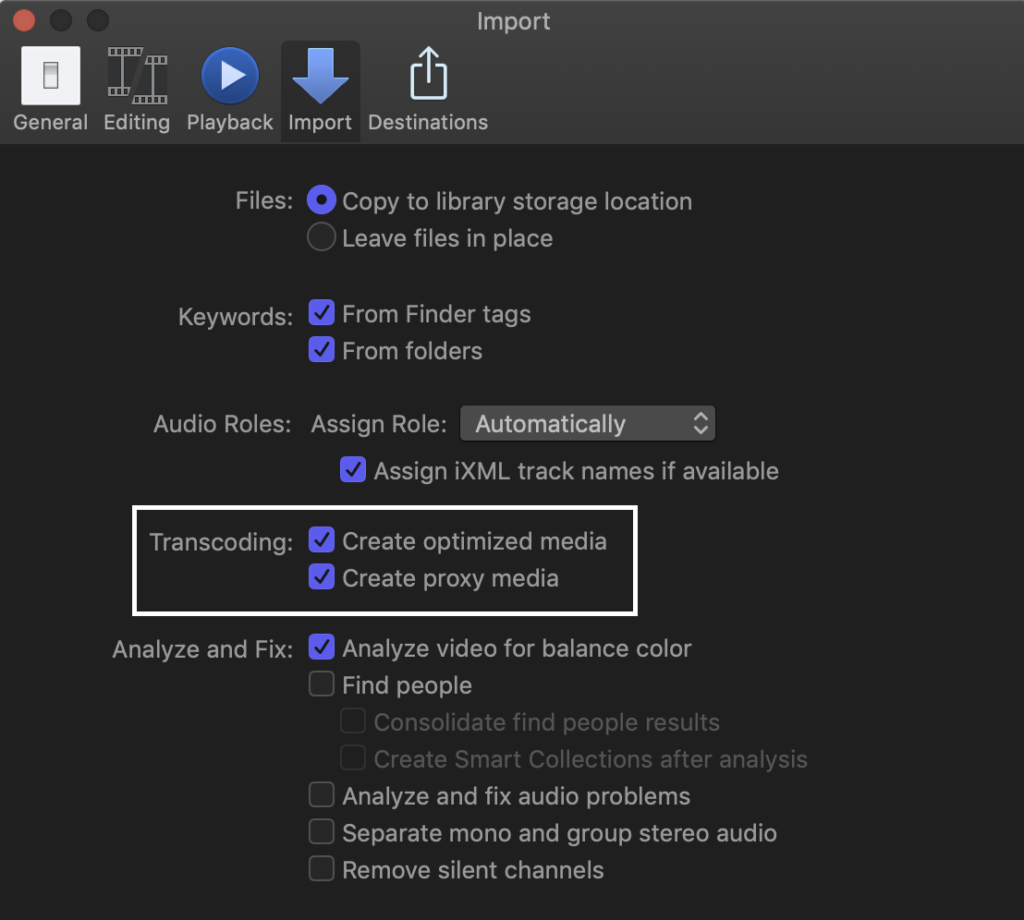
- Under the Transcoding section, make sure Create Optimized Media and Create Proxy Media is check. Now, when you import your media, FCPX will automatically create the optimized and proxy files.
Creating Proxies After Import
If you have already imported your video files and need to create Optimized and Proxy files, you can do this just as easy as doing it during import.
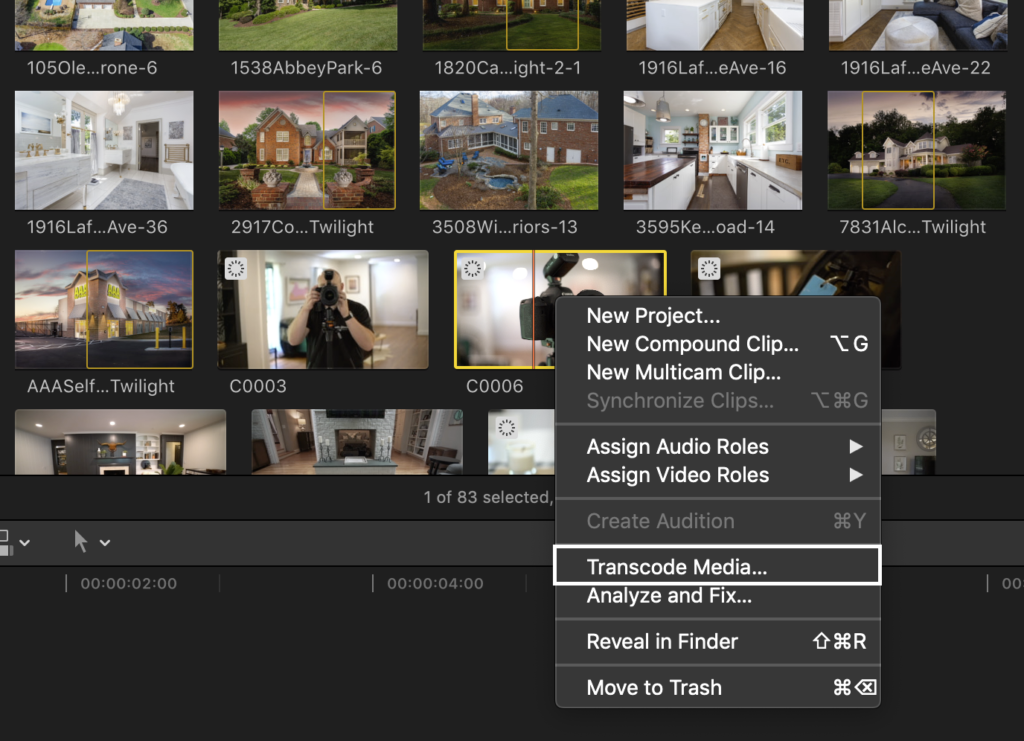
- In your Final Cut Pro browser, Control-Click on one or more of the clips you want to work with and choose Transcode Media.
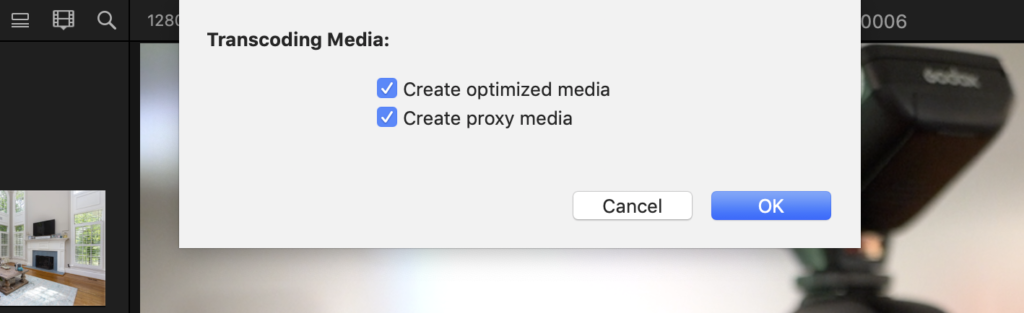
- A window will appear at the top of your Final Cut Pro screen. There all you have to do is check Create Optimized Media and Create Proxy Media and click OK. After this FCPX will start converting your video files into more manageable files. Note: depending on your computer specifications, your computer might run a bit slower until this process is finished.
Now that you have these files optimized you will find it much easier to work with your video. This simple step has increased the speed in which I edit my video projects drastically!


