Usually to get a true infrared effect in your photos you need a camera with a special sensor that is sensitive to infrared light. This can be done through applying a filter inform of your sensor, using a filter in front of your lens, and buy a special camera that is meant specifically for this style of photography and videography. If you are a go this route you will undoubtedly get great results but did you know you can get a very similar effect using Photoshop? In this tutorial, we will cover how to make the Infrared Effect in Photoshop, save this effect as a LUT, and apply it to your videos.
Creating the Infrared Effect in Photoshop
The first thing you will need to do is find an image that you want to use to create your effect. Photos that have a good about of greenery and blue skies work very well. Bring your image into Photoshop and now it is time to add the two adjustment layers that make up this effect.
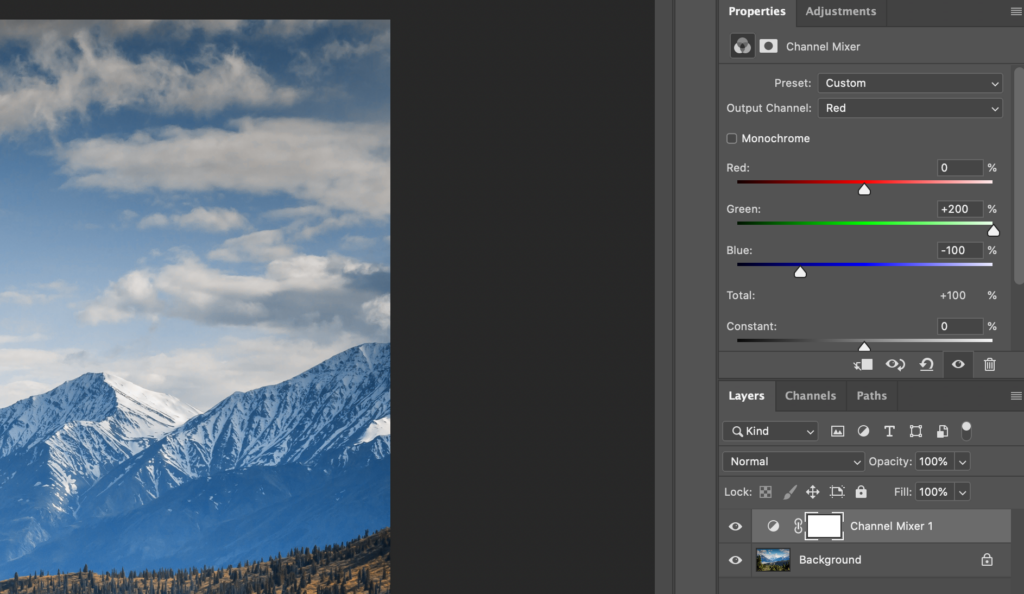
The first adjustment layer we are going to apply is the Channel Mixer Adjustment Layer. Next, you will need to change the values in the Red Output Channel to the Values Below:

Once you have done that, you will need to change the Blending Mode of that layer to “Lighten”.
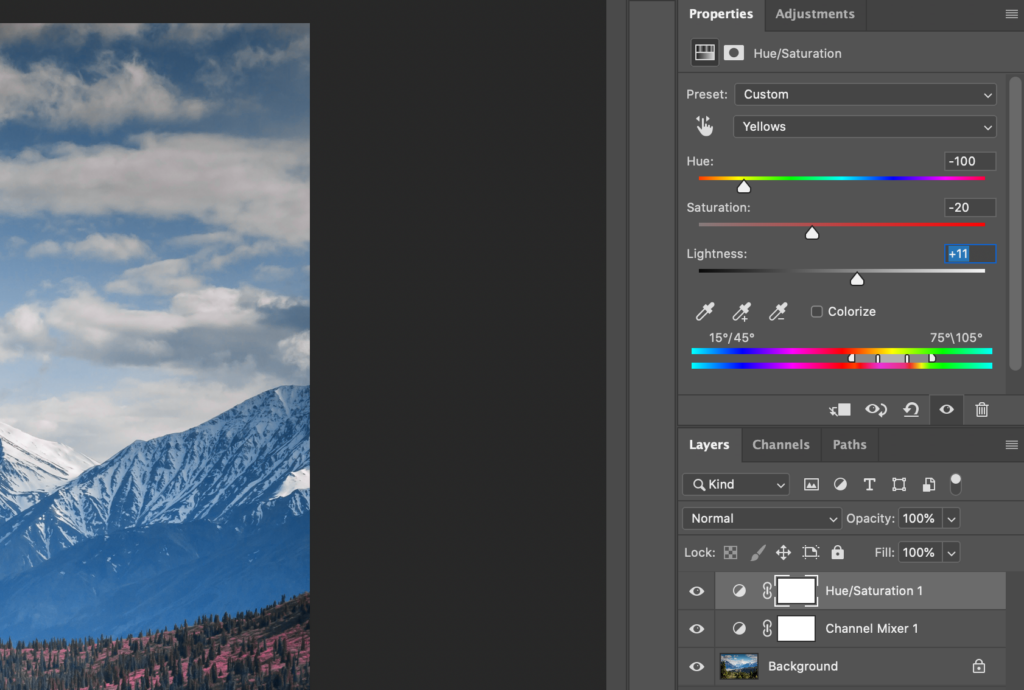
Next, we need to add one final Adjustment Layer and that is the Hue/Saturation Adjustment Layer. Here we are going to change 2 values in the Yellow and Blue channels to give us the final effect.
In the dropbox bow labeled “Master”, change it to “Yellow” and change the Hue, Saturation, and Lightness to the values below:

After this is done, change “Yellow” to “Blue” in the dropdown menu and change the Hue to -10. Feel free to play with the color of the Blue Hue to suite how you like this to look.
Now you are done with the effect! Now all you have to do is export this effect as a LUT so it can be easily applied to your videos. If you are not familiar with how to do this, you can check out the full tutorial here.
If you would like a FREE Photoshop Action so you can easily apply this effect to your photos in Photoshop, click below!


