In 2018, Adobe released an update to Lightroom that was a pretty big deal. It added the feature of Lightroom Profiles that are different than Presets. Profiles are not an exact duplication of settings like Presets, it is more of an interruption of how Lightroom reads the RAW image. Basically Profiles are to photos as LUTs are to video. One thing that a lot go Lightroom users don’t know is that you can use video LUTs in Lightroom to create cinematic photos with one click using these Profiles. In this tutorial, we will show you how!
Installing Through Camera RAW
Believe it or not, to start using LUTs in Adobe Lightroom you will first need to use Camera RAW. If you are not familiar with Camera RAW, it is basically a piece of editing software that is meant for processing RAW files. To open Camera RAW you have a few options; you can simply drag a RAW file (.CR2, .DNG, etc) into Photoshop and Camera RAW will open automatically, or you can open any JPEG file in Photoshop and open the Camera RAW filter by going to Filter > Camera Raw Filter. Either option will work for what we need to import our LUT files as Profiles.
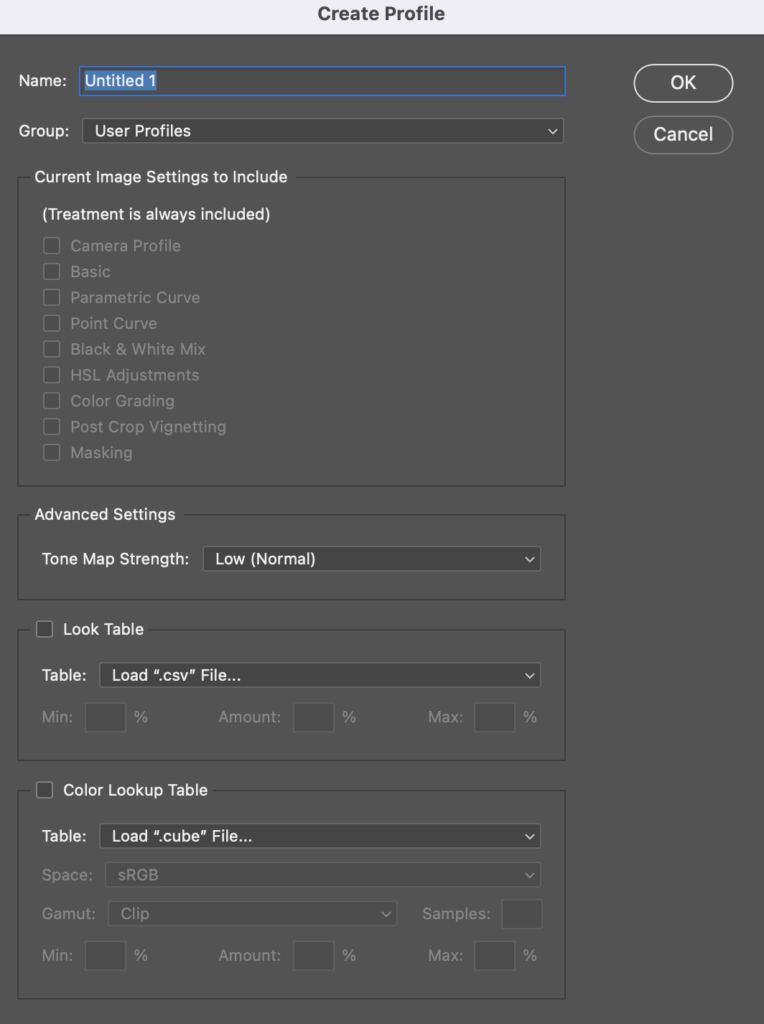
Once you have your image opened up in Camera RAW, you will see a handful of menus on the far right of your window. Right below the Presets icon, you will find the ellipsis menu (the three little dots). Click on the ellipsis and you will see an option that says Create Preset. Before you click on Create Preset you will need to hold a certain key on your keyboard depending on the type of computer you have. If you are a PC user, you will need to hold the ALT key. If you are a Mac user, you will need to hold the Option Key. This will bring up the Create Profiles dialog box (make sure it says Create Profile and not Create Preset).

With this box we just have to change a few things to add our LUT files as a Profile. First I would recommend skipping down to the bottom to the Color Lookup Table section. In the dropbox next to the Table section you will see Load “.cube” File…, click here to navigate to the CUBE file you would like to convert to a Profile. Now, you will need to create a Group for the new file to live as well as give the Profile a new. As far as the Group, I have named mine “Favorite LUTs” as I am converting my most used LUTs for use on my photos. For the name, I will call it exactly what the LUT name is but you can certainly call it whatever you prefer. Once you have everything named accordingly, click OK to return to Camera RAW.
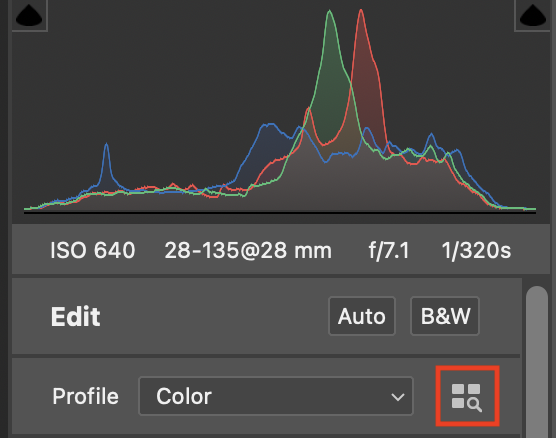
Once back in Camera RAW, to see your newly installed LUT (now Profile), locate the icon next to the Profile label. I shows as three boxes next each other with a magnifying glass. Click here and you will be able to view all of your available Profiles. Here you will find your newly created Group and inside that Group you will find your LUT converted to a Profile.

Now that we have confirmed your Profile is in Camera RAW, you can cancel out of it and return to Photoshop. So now you might be thinking to yourself ” I thought this was a Lightroom tutorial but we have only been working in Photoshop.”. Well this is a Lightroom tutorial but that is the easy part. Let’s move to the last and final step to get your LUTs/Profiles in Lightroom.
Adding LUTs/Profiles to Lightroom
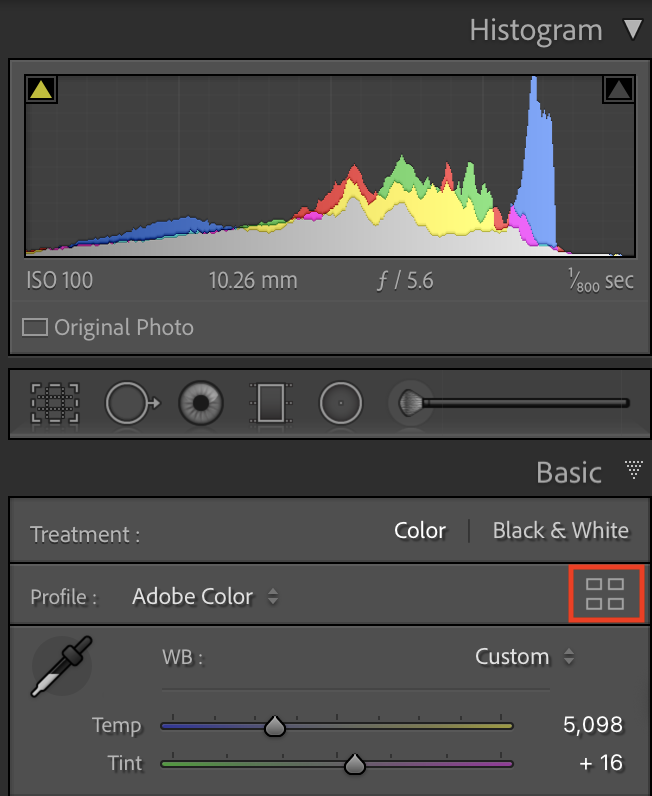
After doing all of the hard work in Photoshop and Camera RAW, the last and final step is to confirm your LUTs/Profiles are showing up in Lightroom. To do this, you will just need to restart your Lightroom so that the new Profile changes take affect. If you had Lightroom closed while adding the LUTs in Camera RAW you simply need to start it up to see your new files added. If you are not familiar with using Profiles in Lightroom, simple open your Develop Module and click on the four-box icon next to the Profile section. It can be found more towards the top near the Histogram much like in Camera RAW.

That is it! Now you are free to use your Cinematic LUTs in Lightroom to edit your photos but there are a few downsides. The first is Profiles only work on RAW files, not JPEGs. The other downside is if you want to add more LUTs, you will have to follow this same process over and over again. Unfortunatley, Camera RAW doesn’t have a way of bulk uploading LUTs so doing this one-by-one is the only current way of adding these.


