If you can’t tell, I absolutely love editing in Final Cut Pro. I mean, this whole site is filled with tutorials on many different aspects of that software however one thing does bug me when it comes to using LUTs. Currently, you are unable to preview a LUT file without applying it to your clip first. You can find a third-party software that can do this but currently this feature is not built into the software.
If you work with a ton of LUT files like I do, this can be very frustrating but this lead me to try to find a small workaround. In this video tutorial, I’ll show you how I use video presets to help save my favorite LUTs in one place so I can easily preview and apply them to my clips.
Before We Start, What Are Presets?
If you are familiar with programs such as Adobe Lightroom, you will have most likely heard of the term Presets. This basically means a set of settings that can be saved and applied to other photos or videos in the future. using Presets is a great way to speed up your editing workflow especially using them for simple color grading or exposure adjustment tasks.
In Final Cut Pro X, you can use Presets to save effects that you added to one clip and simply drag that effect onto your remaining clips so they will all have the same settings. This will ensure that all clips match as best as possible.
Using Presets To Preview Your LUTs
As I mentioned before, FCPX doesn’t have a way to preview your LUT effects. This is certainly a feature I hope that is added in the future but I was able to find a small workaround that has saved me time, especially when using the same LUTs over and over.
First, find and select the footage that you would like to color grade. Then, head over to your video effects and click on the Color category and drag the Custom LUT effect onto your clip. (Quick see note; I am using this Preset example to preview my favorite LUTs but you don’t have to do it this way. This process can be used without using LUTs).
Now, select your favorite LUT file in the dropdown menu to apply it. You can also play around with the Mix slider to fine tune the effect if needed. In this example, I am using one of my favorite LUTs from the Influencer Cinematic LUTs Collection called Lively. Next, you can apply any further color grading effects if needed. I will just adjust some simple exposure adjustments as well as some mid-tone color grading.
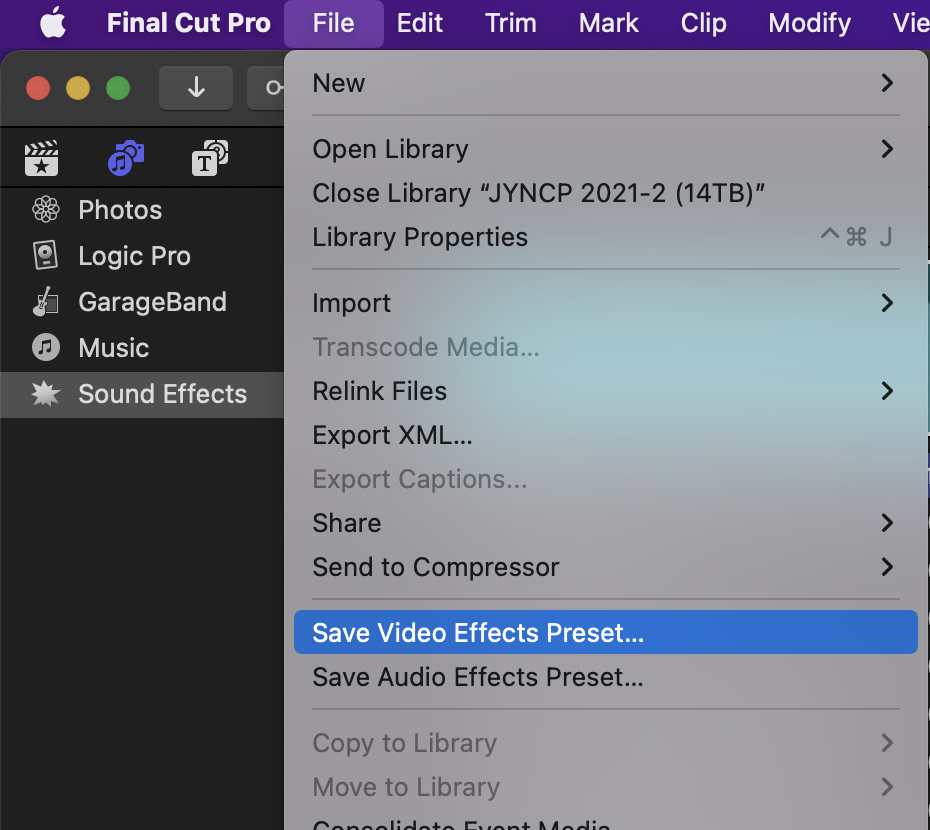
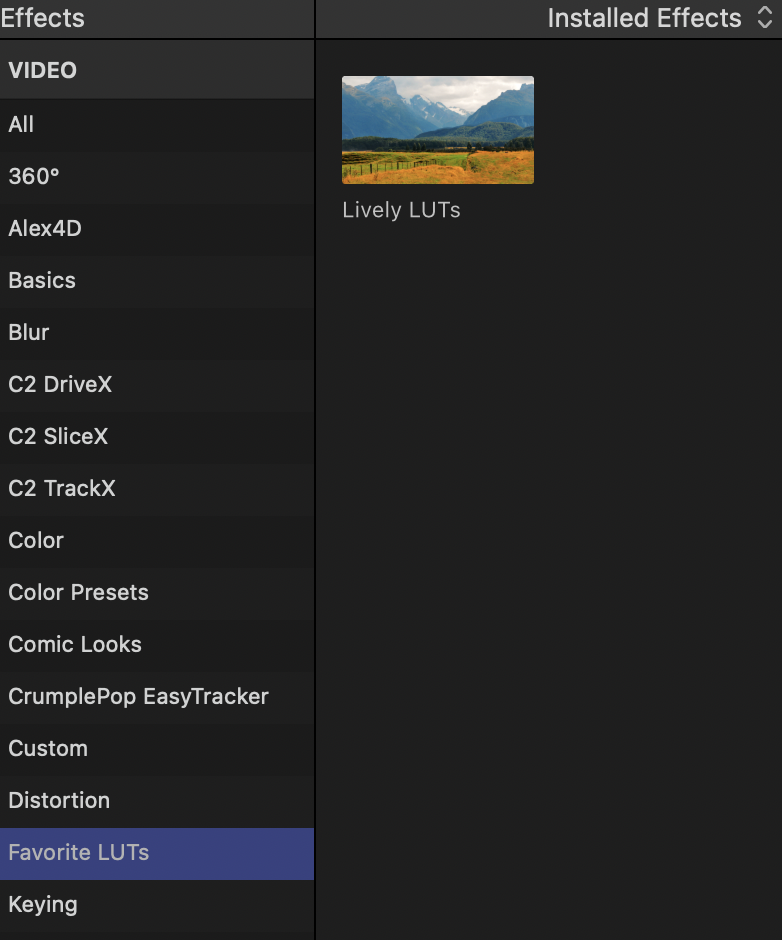
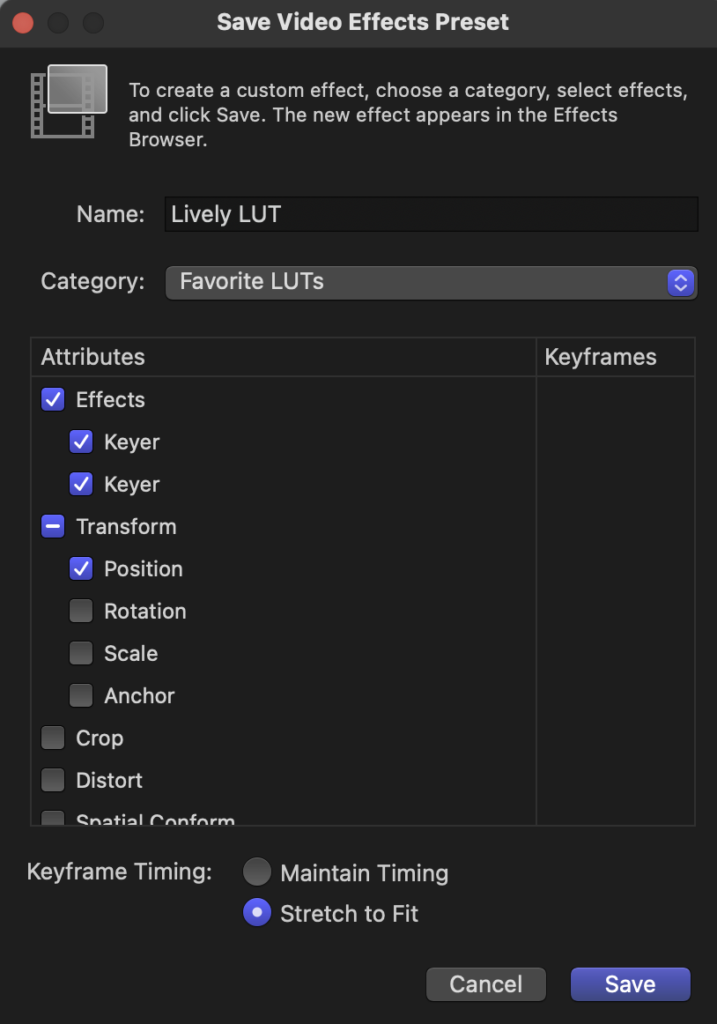
When you have the effect the way you want it to look, it is time to save your preset. Head up to the File menu and Click Save Video Effects Preset. The Save Video Effects Preset dialog box will come up and here is where you can name your effect as well as create a Category for your Preset to be stored in. It is called a Category but think of it like a folder. Since I am using this Preset as a way of previewing a favorite LUT for future reference, I will name it after the LUT itself. Once this is done, you can click Save and you have successfully created a custom preset.
Now, you will see your newly created Preset in your Video Effects that you can simply drag onto your future clips. You can also hover over the new effect and see a preview of how it will look without applying it to your footage.