Sharing or export destinations are the way you take your video out of Final Cut to besmeared with the world. If you are familiar with Adobe Premiere you will find that this process of exporting is very different but more simplistic as most Apple products tend to be. Here we will show you how to create custom export destinations for the 3 most common scenarios; Exporting to Disk, Exporting Directly to YouTube, and Exporting an Image (this method is typically used to create a thumbnail directly from your video).
Exporting to Disk
The most common way you will want to export your videos is directly to your computer. This will give you the option to upload it to Dropbox as a way to share through email or to upload to social media channels like Facebook.
- Click on the Final Cut Pro Menu at the top-left of your screen and select Preferences.
- Click on the Destinations tab and you will see your current Destinations on the left column and the possible options on the right.
- Click on the Export File option and drag it to the left-hand column.
- Slow click on the Export File you just added. This will give you the option to rename it. You will also see your export options on the right. here you can set it up however you see fit. I typically like my settings as pictured below.
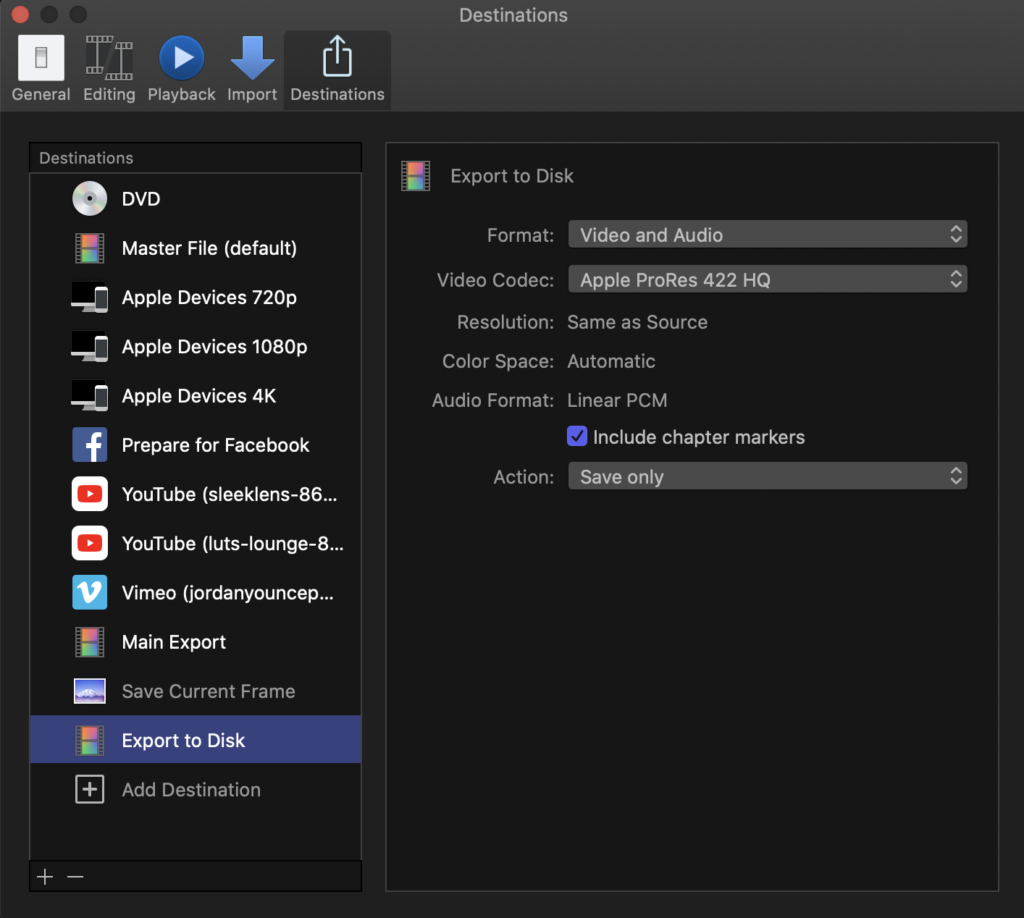
- 5. After you have set up your export settings you can simply close out of the Preferences box to save your custom destination. Now when you click on the Share button at the top-right of your Final Cut Pro window, the Export to Disk destination is available.
Exporting to YouTube
This is one of my favorite exporting options for a few reasons. The main reason is that I am able to complete a video project and send it directly to YouTube instead of exporting the project, waiting for it to finish, uploading it to YouTube, and then waiting for that to finish. This eliminates many unnecessary steps.
- Click on the Final Cut Pro Menu at the top-left of your screen and select Preferences.
- Click on the Destinations tab and you will see your current Destinations on the left column and the possible options on the right.
- Click on the YouTube option and drag it to the left-hand column.
- You will need to sign in to your YouTube account from Final Cut. To do this, you will need to click the Sign In button in your export options. This will open a webpage for your to input your credentials. Once that is completed you can return to Final Cut to finish the setup.
- For resolution, you can choose the default resolution you plan to export your videos in. This can still be changed later. For compression, I typically choose Better Quality, for Privacy, I select Private as I want to make sure the video does not go live until I can finish the rest of the setup.
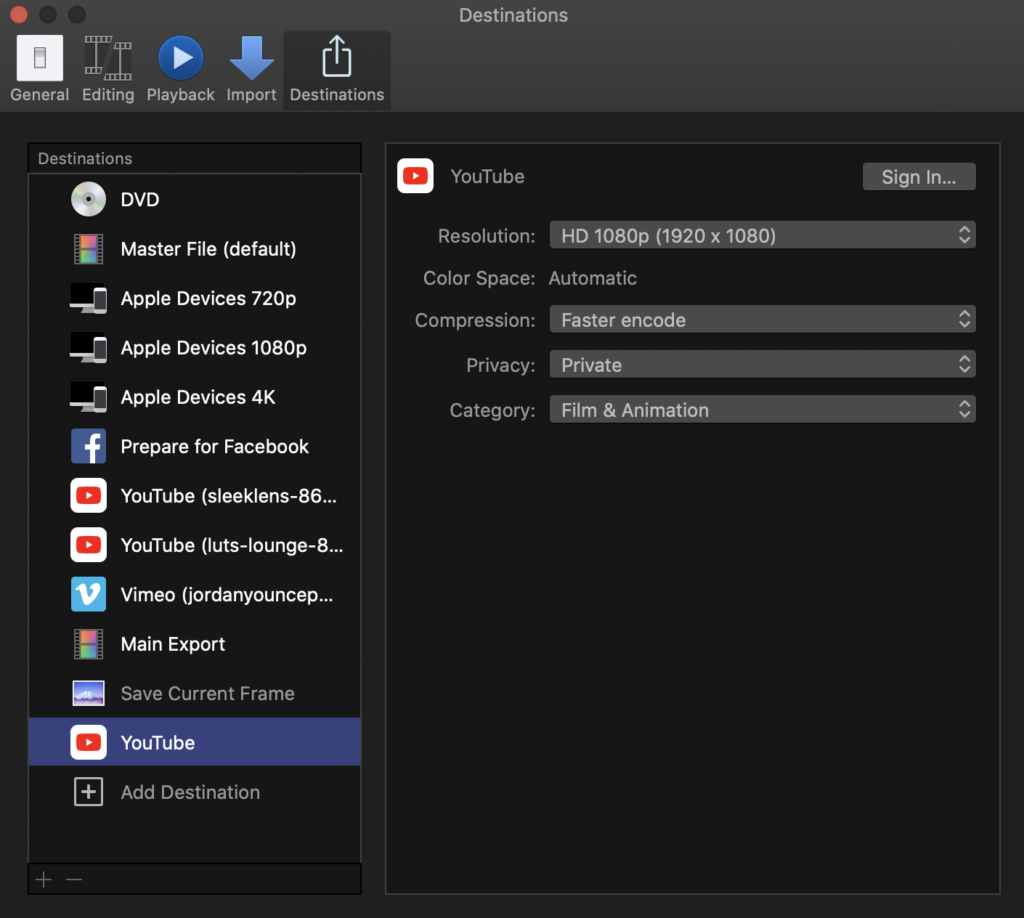
- 6. After you have set up your export settings you can simply close out of the Preferences box to save your custom destination. Now when you click on the Share button at the top-right of your Final Cut Pro window, the YouTube destination is available.
Exporting Image
This option is typically used for selecting a frame from your video and exporting it as a JPEG. one reason this is done is to create a video thumbnail from your video.
- Click on the Final Cut Pro Menu at the top-left of your screen and select Preferences.
- Click on the Destinations tab and you will see your current Destinations on the left column and the possible options on the right.
- Click on the Save Current Frame option and drag it to the left-hand column.
- The options for this destination are pretty simple. It defaults to TIFF but you can select JPEG Image which is what you will be needed 99% of the time.
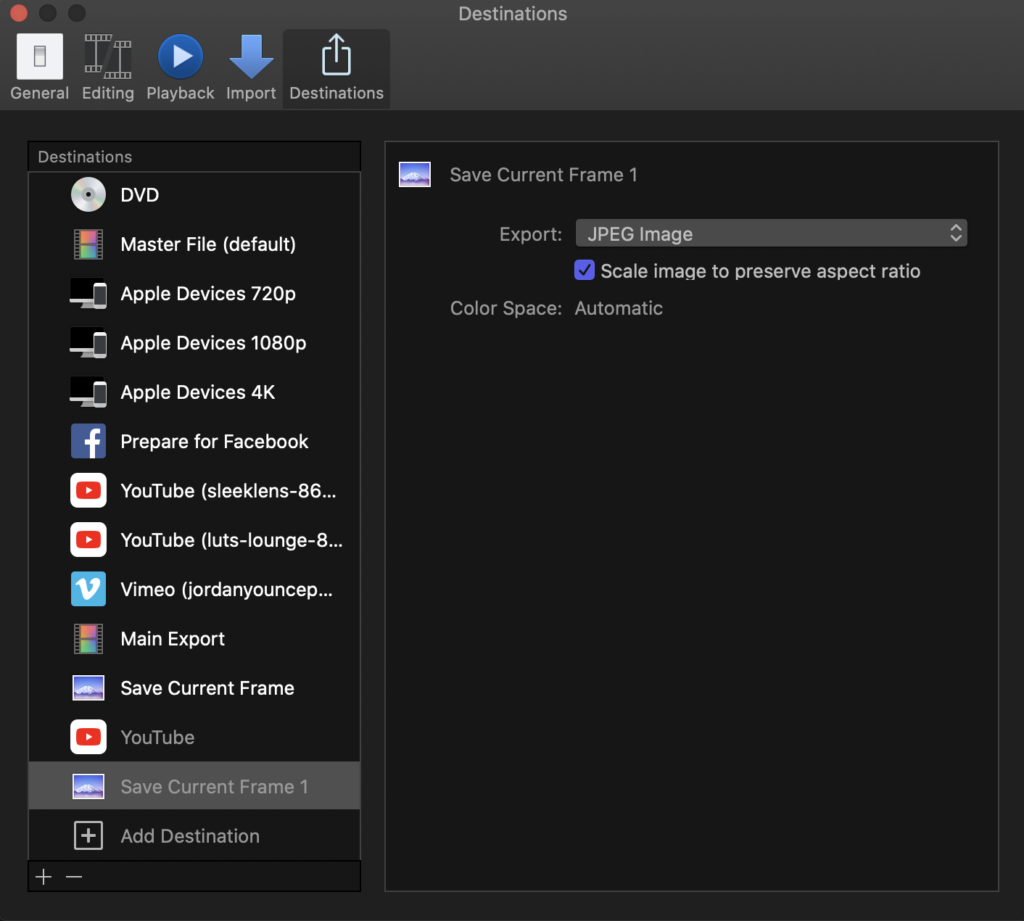
- 5. After you have set up your export settings you can simply close out of the Preferences box to save your custom destination. Now when you click on the Share button at the top-right of your Final Cut Pro window, the Save Current Frame destination is available.


