Checking your white balance when editing photos can be tricky. You can use the built in eye dropper tool to sample from your image but sometimes that can not give you the desired result.
There is another way to check your white balance and make sure your whites are white and it just requires a simple change to your Lightroom interface.
When you are in Lightroom Classic, go to your Preference settings and select the Interface tab. Under the Background > Fill Color section you will most likely see yours set to Medium Grey. This is the default settings unless you have changed it before.
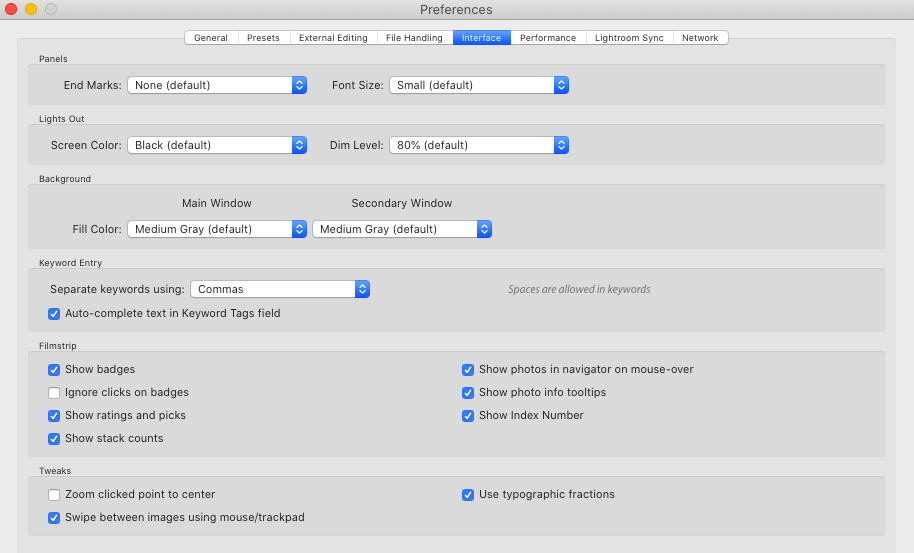
Change this setting to “White”. You can now close out of the Preferences panel and return to your Develop module.

Now, while you are editing, you can simply refer to the white background and adjust your white balance accordingly so the whites in your image match up. Think of it as a handy white balance card!


