If you have used Final Cut Pro for any amount of time, you may have noticed the space on your hard drive getting much smaller. This was the first thing I noticed after using the program on a regular basis. I just could not figurte out now my 2TB hard drive went from having over 900GB of free space to being less than 100GB! Then I did some digging and found I have been keeping all of my original media as well as my rendered and optimized files stored in Final Cut the whole time! This was definatley the culprit and I just needed to find a way to handle this before I completely run out of space on my computer!
How to Delete Render Files
One of the best ways to prevent your hard drive from filling up so fast when working with video is to delete the rendered and optimized files that Final Cut Pro creates. These files are created and stored within your individual Final Cut libraries and are really not needed once your video files are finalized. If you are one to store the project files in FCPX for a while to easily make changes in the future, deleting your rendered and optimized files are important unless you have TONS of space to spare.
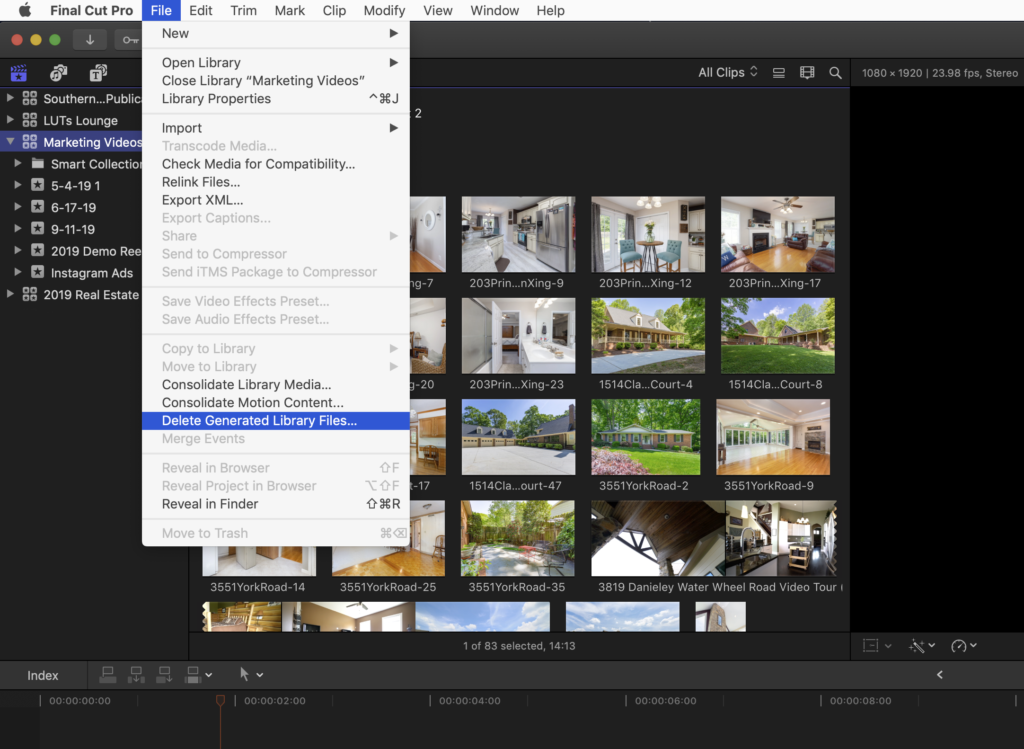
To delete these files click on your Libraries Sidebar to display all of your projects. If you have individual Libraries, click on the one you work with the most as it most likely has the best chance to free up space. Right-click on that library and go to the File menu and select Delete Generated Library Files.
Once you do this you won’t see anything happen immediately but this will prompt FCPX to start deleting these files in the background. I recommend to note how much hard drive space you have on your HD before you do this and compare it to the amount you have after this step is completed. If you do have multiple Libraries setup, you will have to repeat this step for each one.


