One main feature that has always been missing from Final Cut Pro X is Object/Motion Tracking. Other programs such as Adobe Premiere have had this feature baked in for a while and the only way to do it in FCPX was to purchase a third-party plugin from sites such as PixelFilmStudios. As a matter of fact I actually bought the Auto Tracker from PixelFilmStudios and while it did a decent job I always felt like it could be faster and simpler if it was builtin. Now, in Final Cut Pro X version 10.6, Apple has added this feature and it works beautifully. Let’s talk about how to use this feature and just how easy it is.
First Off, Update Your macOS
Before you can update your FCPX to version 10.6 you will need to update your macOS if you haven’t already. I was running macOS Big Sur so I had to update to macOS Monterey to even begin to download the new FCPX update. Just remember it is always a good idea to backup your most important files before update your OS. Once you have the new OS, you can head to the App Store and download the newest Final Cut Pro X 10.6 update.

Adding a Tracker to Your Footage
Once you have your video clip added to your timeline it is extremely easy to add a tracker. A tracker is basically a box that appears on your clip that FCPX will motion track automatically while your clip is in motion. Once this process is finished you can allow it to any graphic, title, or animation in your timeline. I might be getting ahead on myself so let’s hope back a bit.
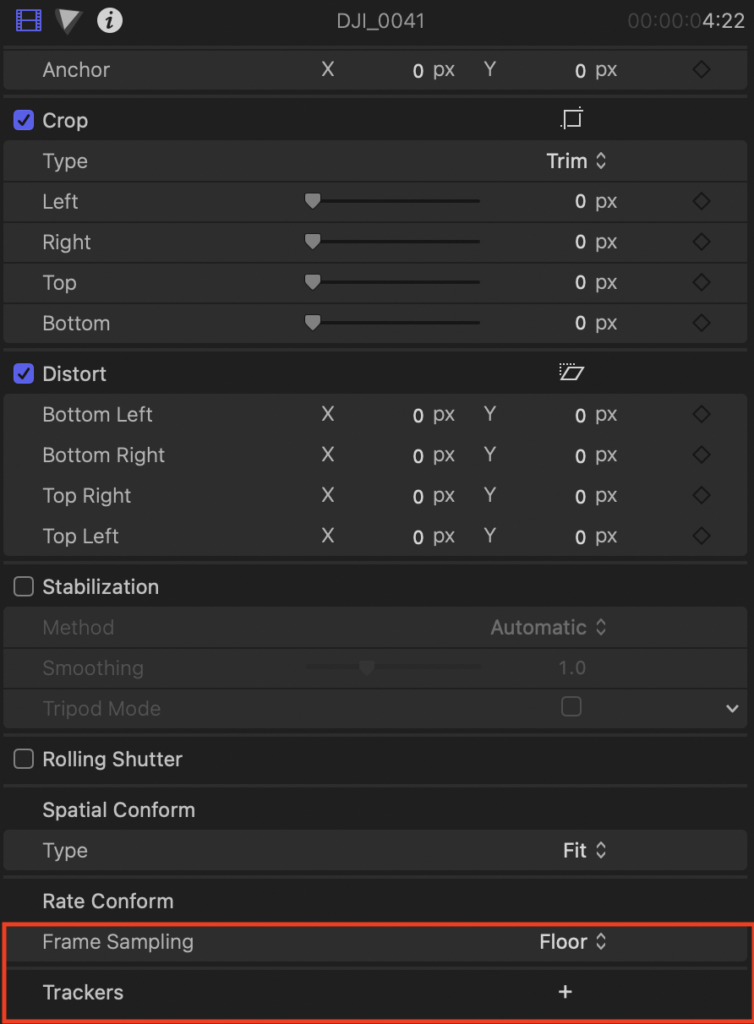
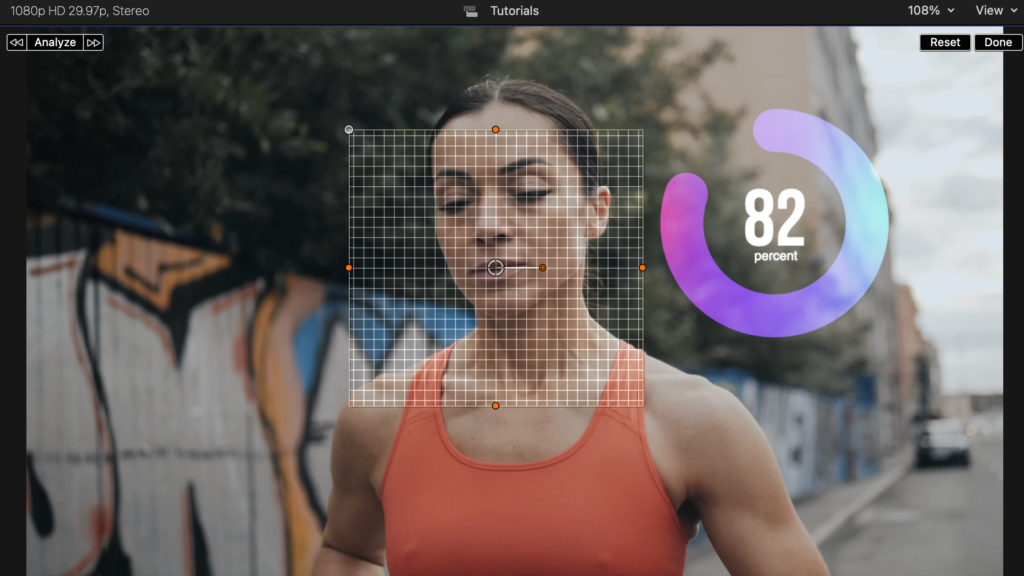
To apply this tracker, select the clip you want to motion track and go to your video inspector. Scroll all the way down to the bottom of the inspector and you will see a section labeled Frame Sampling. Under that you will see a Trackers section with a “+” sign next to it. Click on that + sign and a wireframe box will appear on your video.

This is the box you can size up or down and place over the object in your video that you want to track. It is always best to choose a high-contrast item in your clip to provide the best result. That begin said, I have been playing with this feature for a while and it as done a fantastic job tracking very tough subjects. Once you have your wireframe tracker resized and positioned on the object you want to track, you will see an Analyze box in the top left of your Viewer. Once you like this button, FCPX will begin to track that box in your footage forward then will track backwards as well. This is especially nice as most other third-party trackers would not do this automatically and wouldn’t do it nearly as fast.

Once Analyzing is completed, you can head back to your Video Inspector to find an “Object Track” section. This is your tracking analysis so you can delete it if you want to try again or you can double-click it to rename it. one thing to note, you can apply multiple tracking analysis to the same clip so it is always good to rename.
Adding Your Graphic and Applying Tracking Analysis
Now that the tracking analysis is complete, now it is time to add the graphic or title that you want to be tracked on your clip. I mention both titles and graphics because the process for adding and tracking these assets is the same. For this written example, we will use a simple graphic but in the video walkthrough above, you can see you can also use animations.
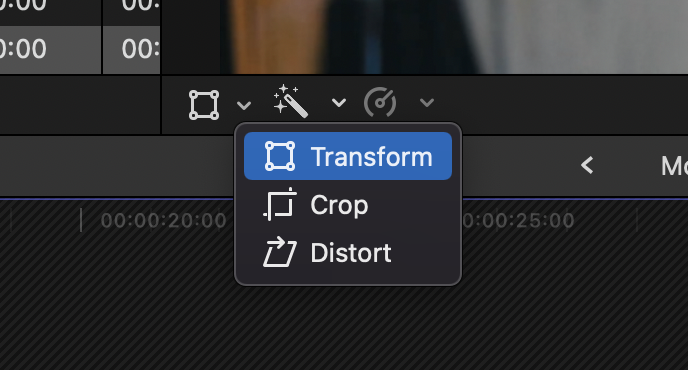
Grab the graphic you want to add and drag it on top of the analyzed clip. Make sure you have the clip as your active clip. Now position the graphic where you want it to be on the video (don’t worry, you can always change this at anytime) and clip the Transform button at the bottom left of the Viewer and from the pop-up menu, choose Transform.


Now you will see in your viewer, a couple buttons at the top that say Transform and Tracker. Next to the Tracker you will see a small downward facing arrow. Click on that arrow and you will see the analysis data from your original clip. If you have renamed it, it will be whatever the given name is but if you did not rename it will say Object Track. Clip on object Tracker (or whatever name you might have given it) and now your tracking data is applied to your graphic. It is that simple! You can now refine the graphic to fit your video however needed.


