The Dolly Zoom Effect as an effect used in major cinematic movies that you have most likely seen but never realized what it was actually called. The first time I noticed this effect was in the movie Jaws. It was such a dramatic effect and I wondered how they did it. After researching, I found this effect was originally accomplished with a camera on a “sled” and rails. The sled would slide on the rails and the camera would slowly “push” into the subject while at the same time the camera would zoom out at the same time. To finish it off they would speed up the footage in post-processing.
Here is the original effect in Jaws.
Now you don’t have to have a huge dolly rig to achieve this effect these days. It is actually very easy to get a similar effect right in your editing program. In this tutorial, I will show you how easy it is to do this effect in Final Cut Pro X but you can accomplish the same thing in almost any editor.
The Effect and the Gear Needed
This effect doesn’t work on all types of video footage but all you really need is a simple push-in or a pull-out. This can be as simple as just walking up to your subject or walking away. One thing I would note regarding this is you can basically do this with any camera but for the best results, you will need a stabilizer to get the most smooth footage possible. Using a stabilizer will mimic the effect of actually being on a dolly.

Once you have your footage, it is time to take it into Final Cut Pro and apply the effect. You can also do this same type of effect in Adobe Premiere or Da Vinci Resolve but for this tutorial, I will show it in Final Cut as that is my mean editing program.
After you have your clip placed on your timeline, so to the Transform section and choose Crop. This will then give you 3 different options for how to clip your clip. You will see Trim, Crop, and Ken Bruns. To do this effect, you will need to select Ken Burns.
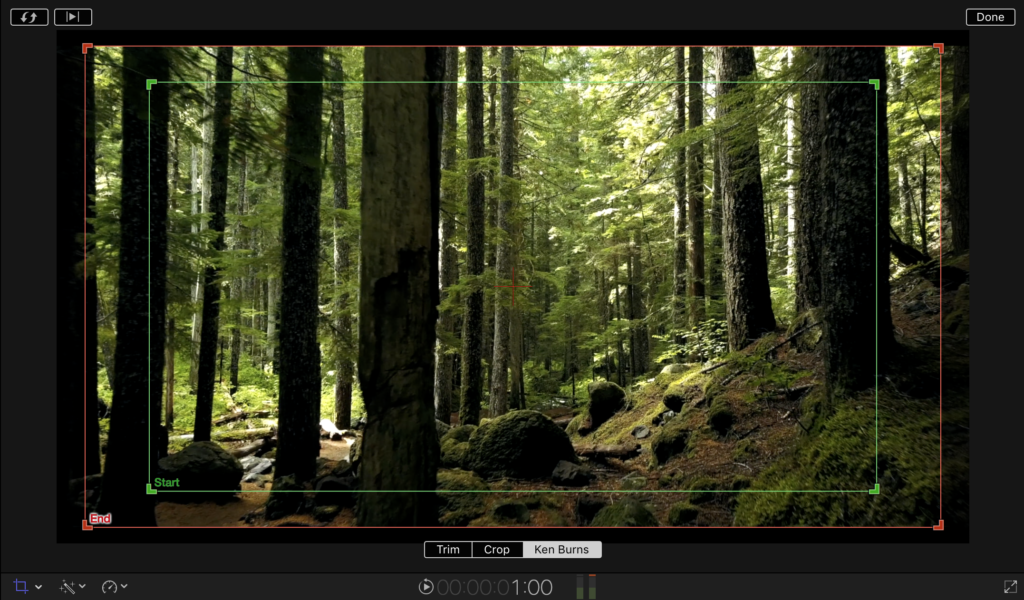
This is where you will see the “Start” and “End” cropping options for your video. Here we now need to determine if you have a clip that is a “push-in” (forward movement) clip or a “pull-out” (backward movement) clip. If you have a “push-in” clip you will need to set your Start and End positions as pictured below:
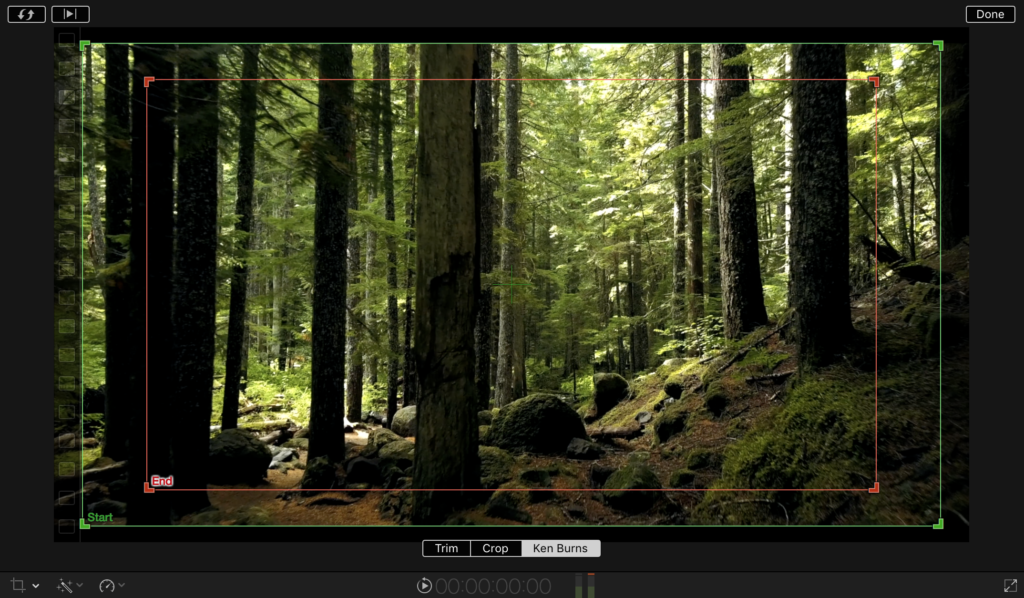
If you have a “pull-out” clip then you would want your Start and End positions to be reversed as pictured below.
Now that you have your Ken Burns effect in place you can change the severity of the crop of both the Start and End markers to either increase or decrease the effect. Once you have done that, you are done! Just play your clip back and check out the Dolly Zoom effect you created!


