Much like we have talked about in other articles, LUTs can be extremely helpful for creating a cinematic look and feel to your videos. Certainly you can purchase third-party these types of LUTs from the LUTs Lounge Store but you can actually make your own as well. This is something I would recommend for anyone who shoots in LOG as well.
In this tutorial, I will show you how I use this method for creating a custom LUT for my BlackMagic Pocket 6k so I can quickly apply basic edits.
Export a Screenshot from Your Video Editor
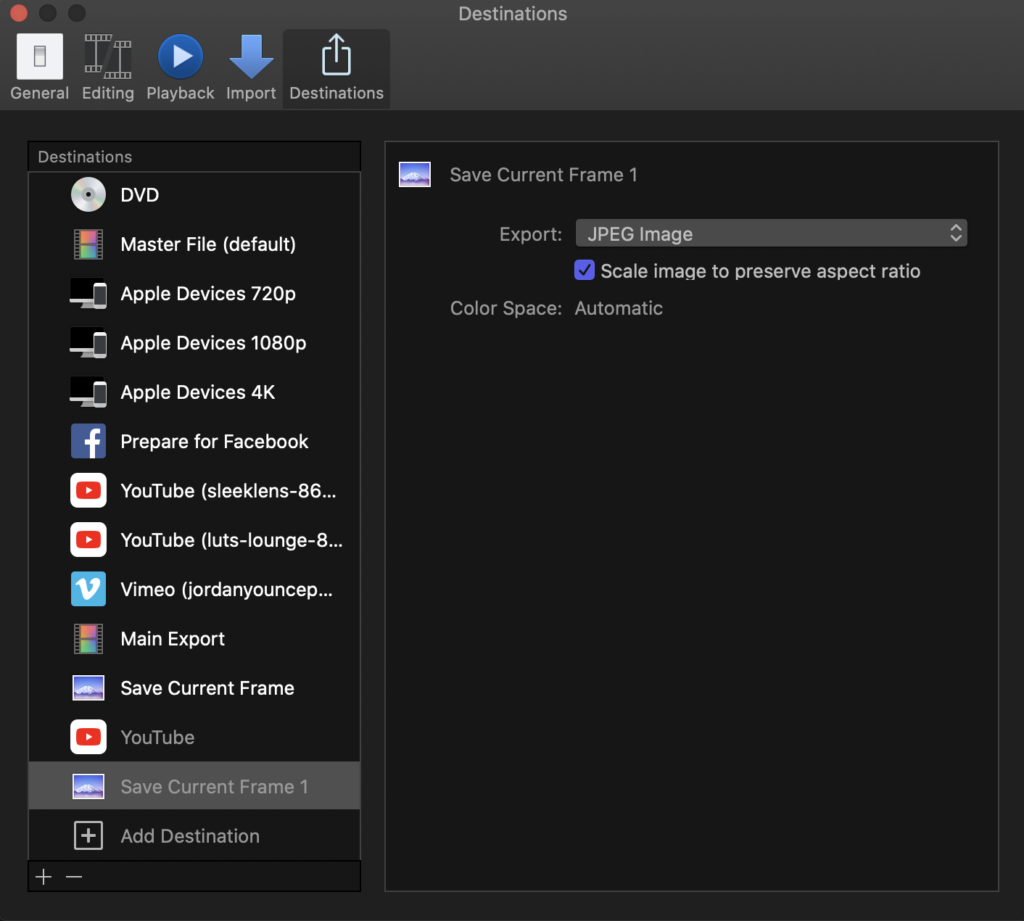
The first step in this process is to make a screengrab from your video footage. This is very easy to do in almost any video editor. In Final Cut Pro, all you need to do is choose Save Current Frame in your share destinations menu. If you don’t see this option, you will need to set it up and you can learn more about that here.
Open Your Screenshot in Photoshop
Now that you have your frame saved as a JPEG you will need to open it up in Adobe Photoshop. For this set you really just need to make sure the layer is locked in your layers panel. This is identified as a “lock” icon next to your image in the layers panel.

Apply Your Adjustments
Now it is time to make your adjustments to the image. The key point here is to make the adjustments layers and not directly to the image. This can simply be done bus electing adjustments using the middle icon at the bottom of the Layers panel (it is the icon represented by a circle with the bottom half filled in). You can make all the adjustments need to get your desired image. For this example, I am going to make basic changes such as Levels, Saturation, and Color Correction.

Export Color Lookup Table File
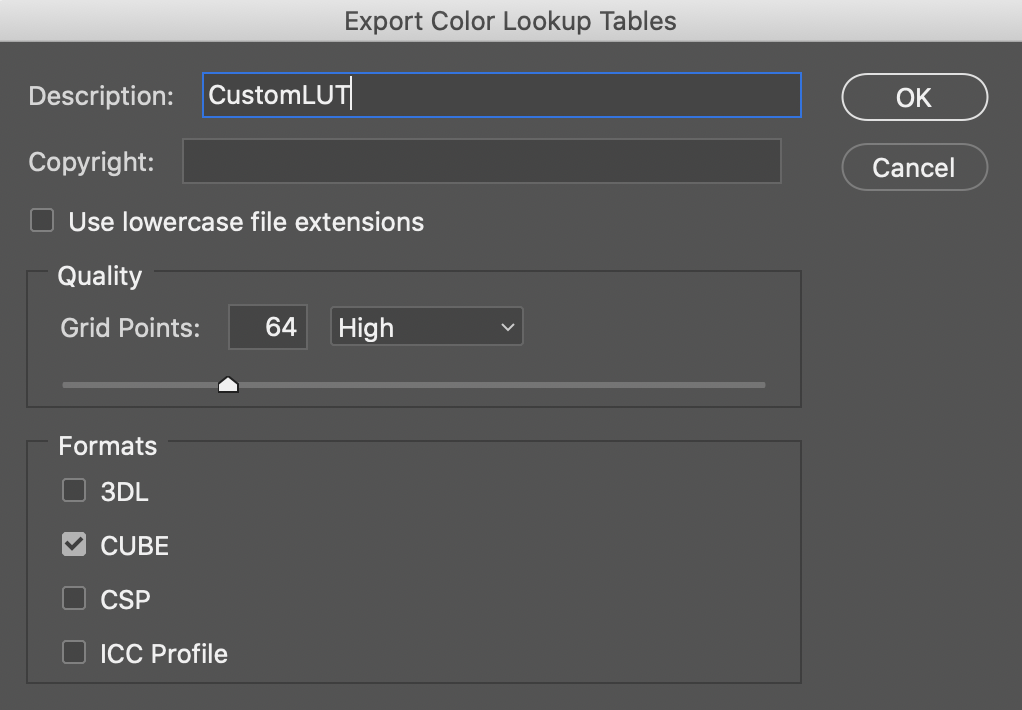
Once you have all of the changes you want made to you photo and ultimately your video clip, now it is time to export your changes as a Color Lookup File. Photoshop makes this extremely easy. All you need to do is go to File > Export > Color Lookup Tables. This will bring up the Export Color Lookup Tables dialog box. Here the main things you need to change is the description, the quality, and the formats. For the description, simply give your custom LUT a name, change the quality grid points to 64, and for the formats you should only need CUBE. You can export all the formats but the CUBE is the most widely used and works with most editors.
After changing these values, click OK. Next you will see a Save As dialog box appear. Here you will need to change your LUT file somewhere on your computer. I created a folder that houses all of my custom LUTs so I know where I can easily find them. Before clicking Save, you will need to change the filename. You can give it the same name as in the previous dialog box but make sure to keep the .lut file extension. After this, click Save.
Apply Your LUT in Your Video Editor
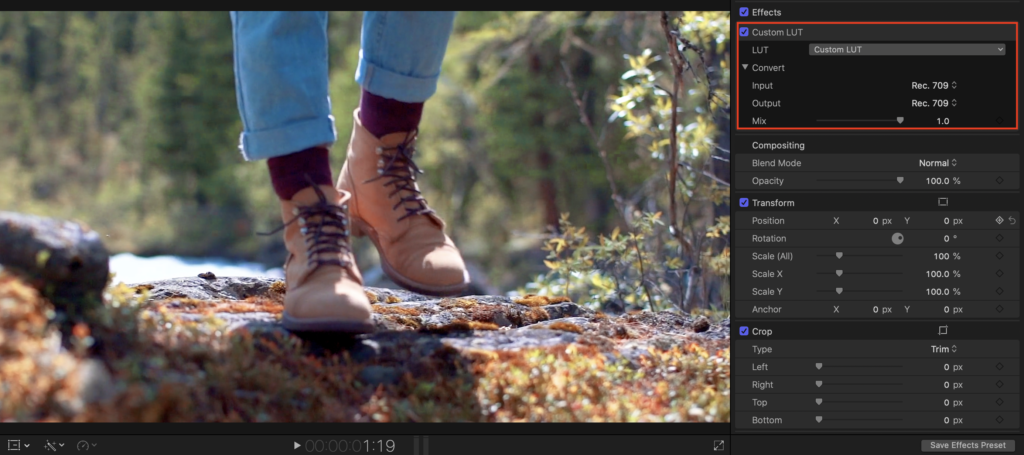
Now that we have our CUBE file has holds all of our adjustments, we can bring it into our editor and apply it to our clips. Many editors do this in different ways but in this example, Final Cut Pro has a Custom LUT effect you can dray onto your clip. Adobe Premiere CC also has the ability to use LUTs with the Lumetri panel but I will be demonstrating this in Final Cut Pro.
Once you drag the Custom LUT effect on your clip, you will need to go to your Video Inspector and you will see the Custom LUT effect. In the LUT dropbox box, you will need to select the Choose Custom LUT option. This will bring up the box to select the LUT we just created. After doing this the effect will be applied to your clip. If you some reason you want to adjust the intensity of the effect, you can play around with the Mix slider. This acts like an Opacity slider in a way but if you created your LUT using this method, you shouldn’t have to make many adjustments.
There you have it! This is a great way of speeding up your workflow and making sure your clips all have the same feel. If you shoot with different cameras, I would recommend creating custom LUTs for each camera as all models shoot differently and produce different LOG footage.


